
The natural world has always been a source of calm and creativity throughout my life. As a child, my siblings and I would spend hours exploring the outdoors, including a real-life batcave! Years later as a teacher, my kindergarten students and I spent months creating elaborate fairy dwellings using natural found objects. Now, in my current life’s passion, I spend my days fawning over pressed flowers and leaves to create my natural jewelry designs. Running a business is not always relaxing, so in moments of stress and busyness, I continue to find ease and joy in the natural world around me--quite literally, stopping to smell the flowers. I think it’s safe to say that nature is my self-care muse!
As we celebrate the earth this month, I'd like to share a floral DIY project with you: pressed flower luminaries. If you aren't familiar with how to press flowers, pick up a flower pressing kit in the shop--it's affordable and easy to learn! Flower pressing is a tradition that dates back to ancient Egypt. It's a simple process that dries plant materials in a natural manner that maintains much of the color and integrity of the plant. The careful process encourages mindfulness of action as well as a deep connection to the natural world, and the end results leaves the door open for numerous creative projects. This is just one option for you to try out.
Pressed Flower Luminaries
Materials:
-
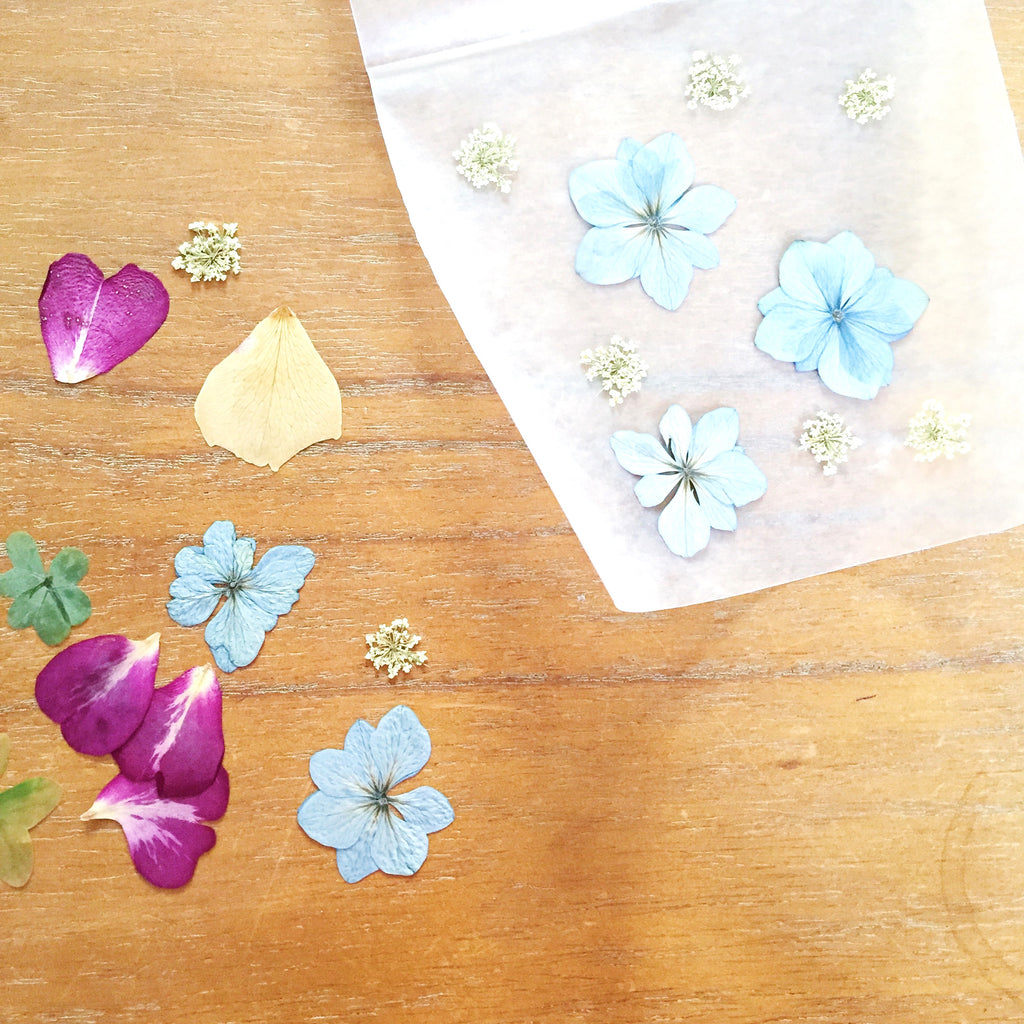
Pressed flowers and leaves (use thin plant materials for this project)
-
Wax paper
-
Scissors
-
Ruler
-
Iron
-
Ironing board
-
Washi or clear tape
Steps:
1. Cut four 5”x10” wax paper rectangles.
2. Fold each rectangle in half to create 5”x5” squares.
3. Open up each folded piece and place dried flowers or leaves on one side of the fold. Fold the top layer back down with flowers inside.
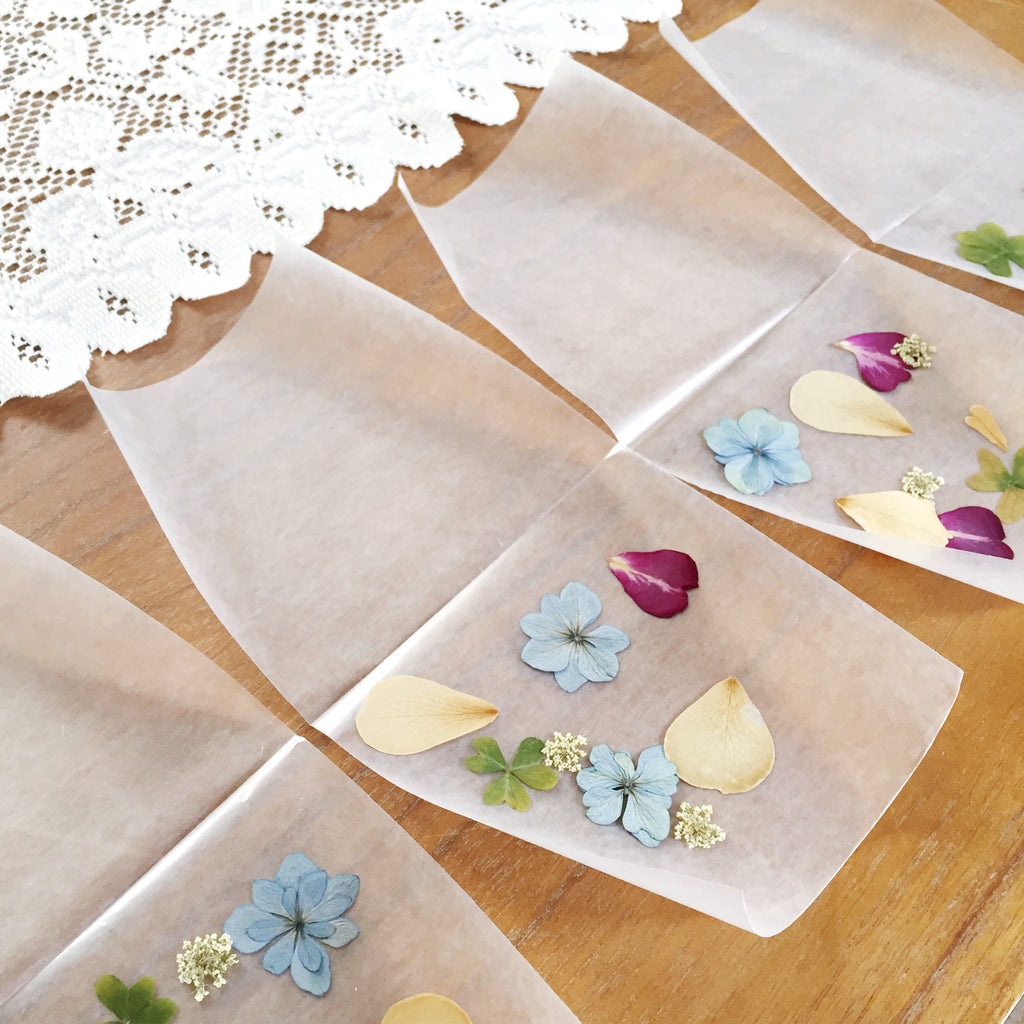
4. Briefly run the iron (on medium setting) over the top layer to seal the two layers together. Do not leave the iron on the wax paper for too long or it will melt! Repeat with all four squares.
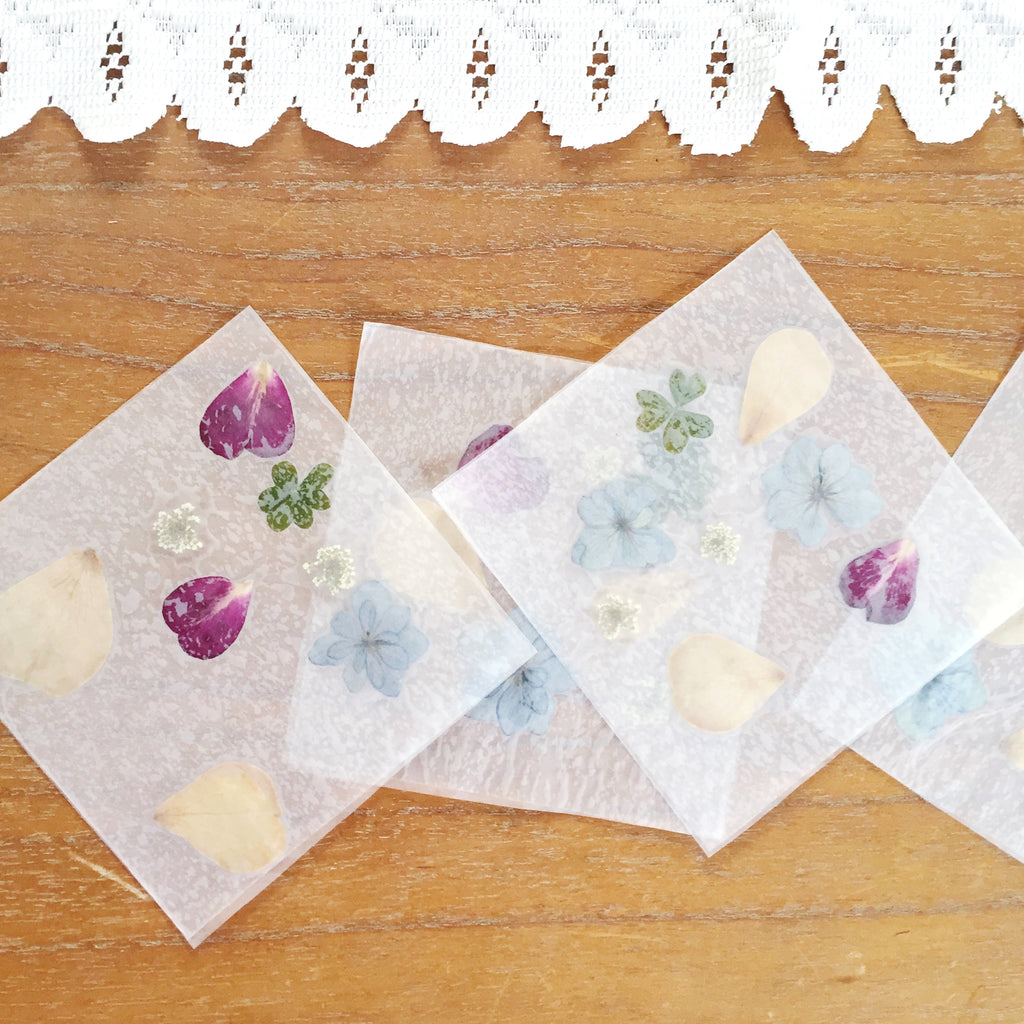
5. Line up all four sealed squares in a row. Use the washi tape to connect them on the seams where they meet.
6. Fold along each seam to create a square box and tape the final seam together.
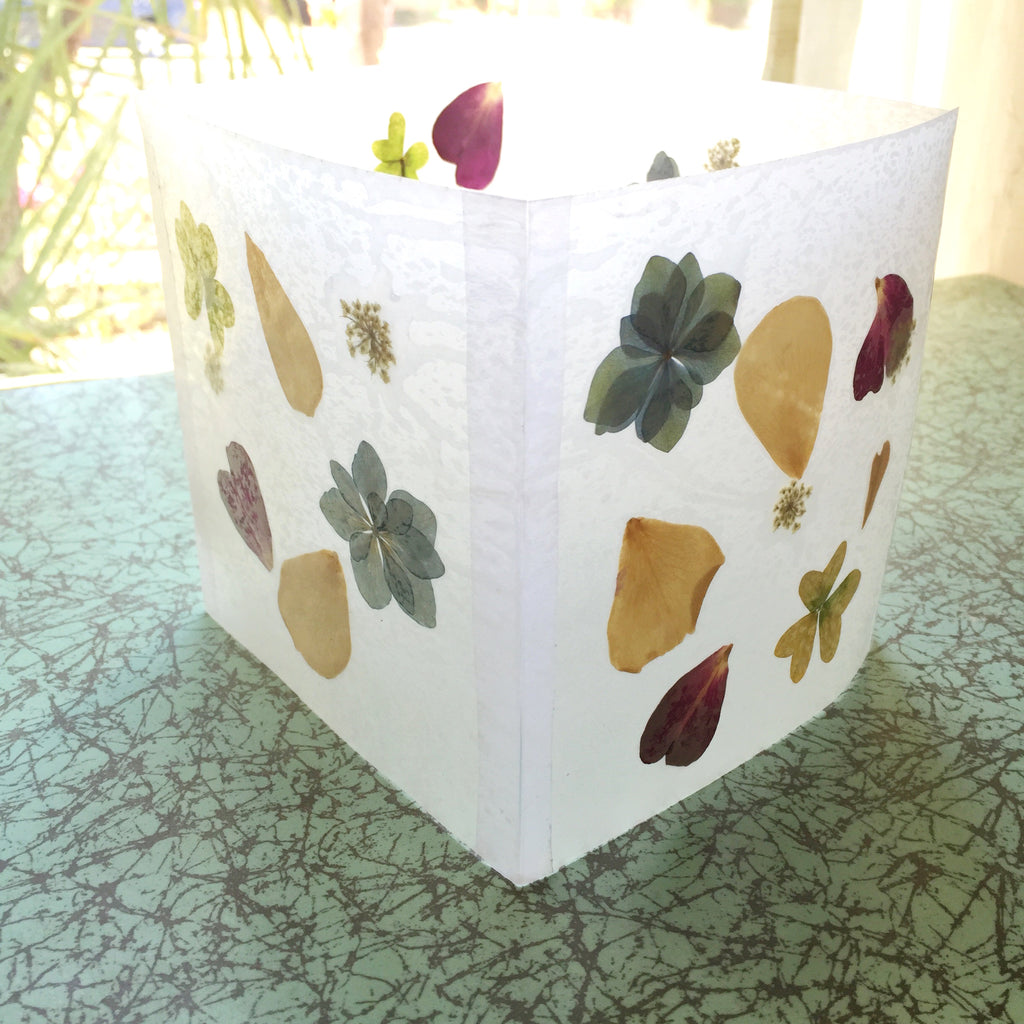
7. Place the luminary near a bright window and let the natural daylight outline the beautiful colors and shapes of the plants or add a small tealight or battery-operated candle in the center and watch the petals illuminate at night.
TIP: Make a set of differently sized luminaries by playing with the dimensions of the wax paper walls.


Leave a comment